
You can acquire or import a single image or a set of images. You can also quickly acquire images for selected teeth. You can also resume single-image X-ray exams and change an exam's name.
Notes:
· Images in "Display all images in template/mount mode" include tooth numbers and capture date. The Schick 33 sensor includes the Edge High image enhancement option.
· You can acquire 3D volumes with third-party programs (See Supported acquisition devices for a list). You can save and store workups, which allows you to create additional workups in the 3D CBCT module. You can also delete these workups.
You can acquire images with a device (such as an X-ray sensor or an intraoral camera) or by importing image files (such as .png or .jpg files). The images will be attached to a patient’s record upon acquisition. When you acquire images, you can customize the acquisition settings, and there are options for posting the associated procedure and billing the procedure to insurance.
Important:
· Depending on the imaging device to be integrated, additional costs from the imaging device vendor may be required, such as the purchase of drivers, to integrate that device with Dentrix Imaging. Before you purchase the Dentrix Imaging add-on or a particular device that you want to use with Dentrix Imaging, consult the manufacturer of that device to verify if there will be costs to get that device working with Dentrix Imaging.
· Some, but not all, devices have been tested using a TWAIN driver. Using a TWAIN driver with certain devices might have unexpected results.
To acquire an image
1. Open the Patient Chart and select a patient.
All images pertaining to the selected patient appear in the Imaging panel.
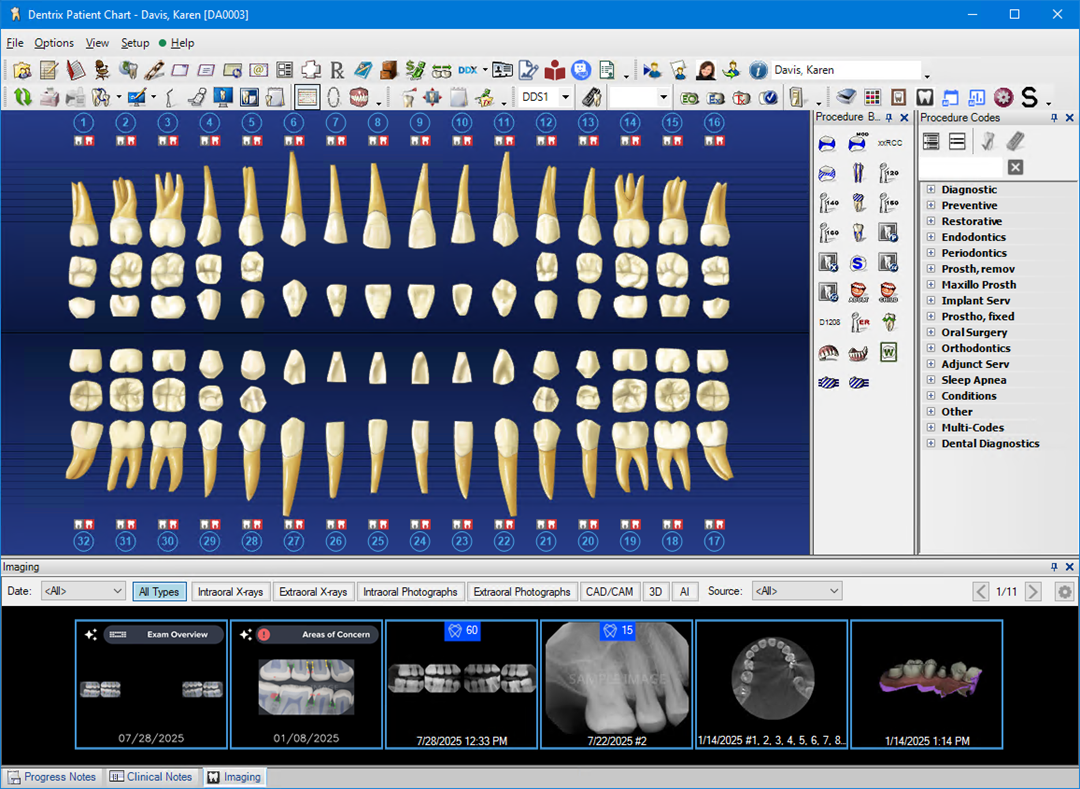
2. To
acquire a new image, click the Launch Dentrix Imaging icon ![]() .
.
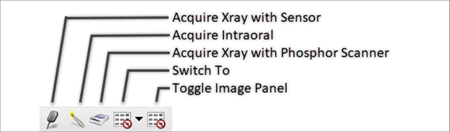
Note: If you are using DEXIS, click the Acquire X-ray with Sensor toolbar icon.
The Dentrix Imaging window appears.
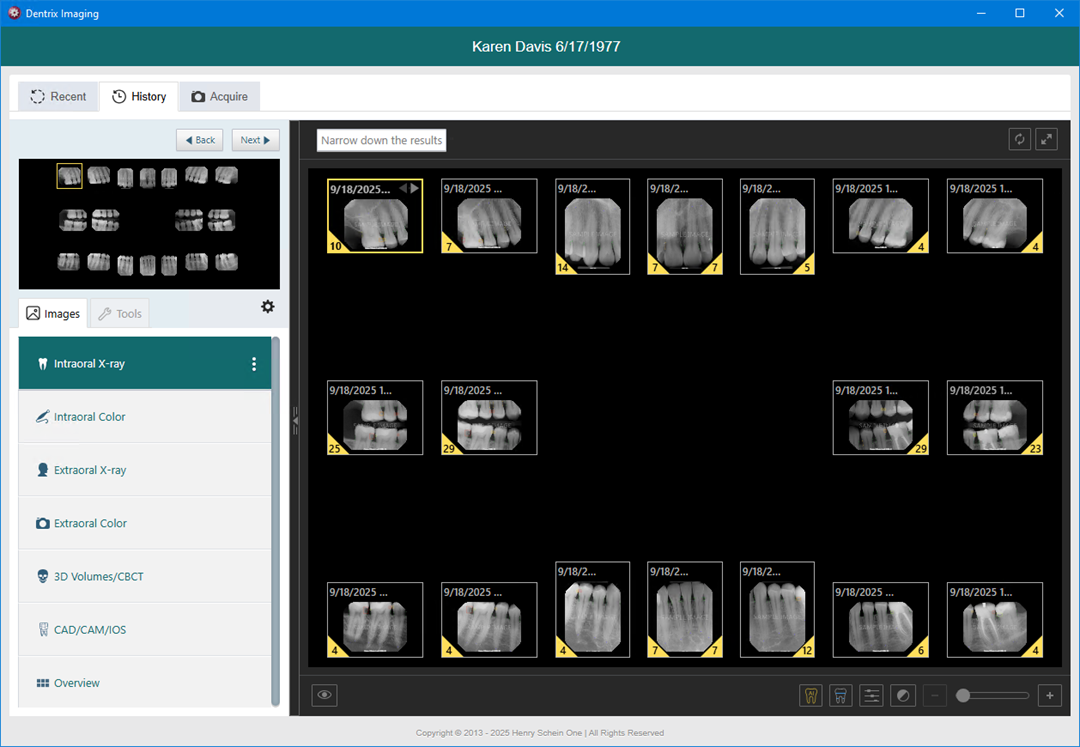
3. Click the Acquire tab, and then click one of the following tabs:
· Favorites – By default, the Favorites tab is selected and pre-populated with a set of the most commonly used procedures. Under Billing Options, the Post codes to Dentrix, Apply charges, and Bill insurance options are selected by default to prevent duplicate codes and charges from being posted to the Patient Chart.
· Standard – Lists the standard imaging procedures that come with Dentrix Imaging.
· Custom – Lists custom imaging procedures that you create. You can filter procedures according to the following options:
· Organization – Custom procedures created in your organization.
· Location – (Default) Custom procedures created in your current location.
· User – Custom procedures created by the currently logged in user.
Note: Under Task to Perform and the Acquire tab, if the acquisition method is not already selected, click the right-arrow icon, and then select the appropriate device from the Available Devices pop-up list.
4. Click Start to start acquiring images for the corresponding acquisition type.
The acquisition begins, and once complete, the captured images appear in the Dentrix Imaging window.
5. If necessary, click Finish Acquisition.
Notes:
· When you are acquiring a series of images, the series finishes automatically when the last image is taken and uploaded.
· You can use the toolbar buttons in the Tools tab to apply enhancements, annotations, measurements, density levels, and effects (invert, color, zoom, sharpen, and contrast) to the image.
The Dentrix Imaging window appears with the History tab selected.
Note: If you have enabled Videa AI, the Patient View is the default display mode. If desired, you can change the display mode.
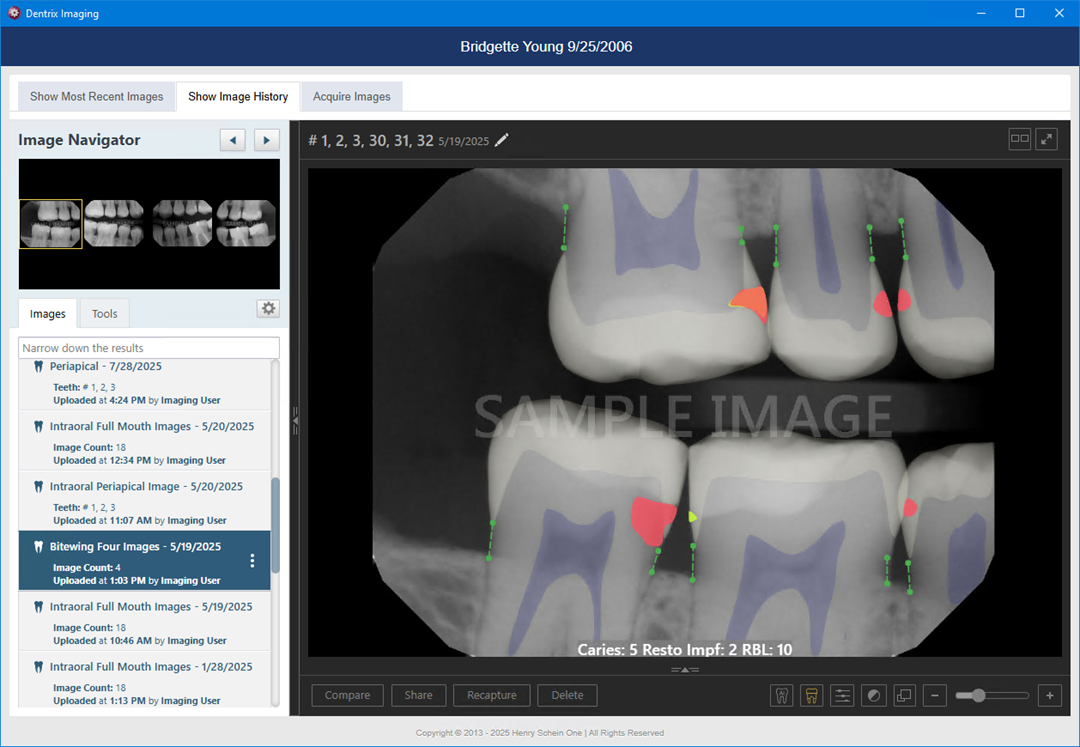
6. To view details of the image, click the Edit tooth numbers icon.
The Assign Tooth Numbers dialog box appears.

7. Click the Image Details tab.
The Image Details dialog box appears.
